Showing posts with label tips. Show all posts

Saturday, September 9, 2017

Plein air problems - shed landscape in oil

A couple of weeks ago I did my first watercolour painting. As a subject, I chose to repaint an old plein air oil painting of a rural shed near my home.

My purpose was two-fold: firstly, to have a go at watercolour and, secondly, to fix a few of the problems in the original oil painting.

Here's the original plein air piece, which I did about 13 years ago.

Barker Shed
35x25cm oil on board.  
© Andy Dolphin

At the time, I was pretty happy with this painting but over the years, I've realised several issues that needed fixing.

The two major issues are a lack of tonal depth – the background is almost as dark and as saturated as the foreground – and the busy brushstrokes and patterns of light and dark over-complicate the scene and reduce the visual impact.

I sorted both of those problems out in the much cleaner and much simpler watercolour painting.

Barker Shed
30x21cm watercolour on Arches medium.  
© Andy Dolphin

Yesterday, I decided to re-do the painting in oil, paying attention to those same problems and trying not to make the same mistakes again.

Barker Shed
30x25cm oil on board.  
© Andy Dolphin

While the finished oil painting is far more detailed than the watercolour painting (and took considerably longer to do), those details retain a sense of unity with their surroundings. The overall contrast, especially of the shed against the background, is much improved from the original.

The tonal pattern of the new painting also provides much better visual impact than the original plein air work. To compare the two, try squinting at them until you only see light and dark. The new painting delivers a much stronger pattern.

I also added a subtle path as a lead in and to break up the large foreground area which would otherwise be a major slab of green. The path carries some of the earthy shed colour down into the lower right corner which helps to create a colour harmony. The distant fruit trees perform a similar role.

You might also note I have dropped that wooden crate from the front of the shed. In reality, the crate is no longer there and I prefer it this way, so I left it out.

Although the final painting is substantially different in effect when compared to the original, it retains a genuine sense of place and I'm sure anyone who is familiar with the location would readily recognise it.

Monday, August 14, 2017

How to make artists' drawing charcoal

I was bored one wet, cold, miserable winter's day, do I decided to have a go at making my own drawing charcoal.

We are lucky enough to have a wide range of trees on our property, including a variety of fruit trees, so I was spoilt for choice of what wood to use.

Willow is often recommended as suitable for making drawing charcoal, but we don't have any willow.

Grape vine is a popular choice and I have also heard of apple being used successfully. We have both of those available.

I snipped a couple bits of semi-hard wood from an apple tree and grape vine then prepared it for roasting into charcoal.

I videoed the whole process, so you can follow along on Youtube.

For those who like a bit of science, I included a brief, simple, infographic explanation of pyrolysis; the process that sees wood turn into charcoal instead of ash.


I did a quick test with the charcoal and thought it performed pretty well, although some bits were a little scratchy. I hope to do a few more experiments using different woods and longer roasting times and see if I can get better results.

Friday, July 28, 2017

How to make wet panel carrier widgets

When I travelled to the John Wilson workshop in Katoomba last February, I had to devise a plan for bringing wet paintings home in my luggage.

I made two wet-panel-carrier boxes from plywood, using balsa wood for the divider strips, but I also needed something for paintings that were too small for the boxes.

After fluffing around with various ideas using timber strips and elastic bands – ideas that failed, I might add – I came up with the idea of making small corner spacers that could be held on with clips.

These would work for paintings in a variety of sizes as long as I had a pair of same-size boards to clip together.

I videoed the making of them and have finally edited the footage and uploaded it to Youtube.


While the process looks a little cumbersome in the video, that's largely because I was trying to orient everything for the camera as I worked on just one widget (and also because some of the balsa proved very difficult to cut, even with a sharp knife!)

In reality, it took less than a couple of hours to make 32 of these little spacer widgets – enough to carry 16 small wet paintings. It took me far longer to make the two box carriers.

I would only use these on small paintings, up to around 10"x12".

I haven't tried yet, but it might be worthwhile to make some straight widgets to clip to the centre point of each edge, and this might make them more practical for slightly larger paintings when combined with the corner widgets.

Wednesday, April 19, 2017

Tangled Web: studio oil painting

Here's number two in my "year of the tree" series.

This group of white gums sits on a farm a few kilometres from home.

While I was initially taken in by the view to the Stirling Range, I was also interested in the patterns created by the twisting trunks and tangled branches and the umbrella-shaped leaf canopies that are typical of many large eucalypts.

As with my last painting, I wanted to capture the strong feeling of sunlight, not only as it played directly across the trunk, branches and leaves of the central tree, but also as it reflected onto the shaded side of the trunk and the undersides of the branches. In fact the shaded branches in the upper canopy have a younger, reddish bark that positively glows with the warmth and strength of that reflected light.

Although they run cattle on this property, I wanted something understated to help balance the image so I added three sheep to the left side. The fence post is also the result of some artistic licence.
 
white gums near stiling range. oil painting by andy dolphin.
Tangled Web
60x40cm oil on board.  
© Andy Dolphin

As before, that shadow colour on the main trunk looked like mud until the bright highlight was placed alongside it. It's quite unnerving to have it sitting there looking "wrong" but I'm sure I'll learn to trust it after painting a few more of these trees.

The trick with something like that is to trust the tone. You need to get that right or it will never work.

Start with what you consider to be the true "local" colour of the bark – a pale ochre in this case – then darken and cool it to the correct tone. Then you will need to add some reflected light into the mix for some parts of the tree. That reflected-light colour is dictated by the area surrounding the tree.

It can seem like a bit of a battle mixing a colour that is both warm and cool, but this approach should get you in the ballpark. Add variety to the bark with some slightly warmer and slightly cooler colours, and it will start to take form.

Saturday, July 11, 2015

Announcing my new blog


floral fireworks still life painting in oil by Andy Dolphin
Floral fireworks
12.5cm x 22.5cm oil on ply panel.
© Andy Dolphin

I've had a bit of a break from painting but things have been happening - a lot of it has more to do with antique clocks than painting, but things have been happening.

One big change is that my blog now has a new home on my new website, made by my son Michael Dolphin.

If you have this site bookmarked or memorised, you'll need to change your links, or rewire your neurons, and make note of the new address at andydolphin.com.au/blog/

To launch the new site, I have uploaded a new three-part video to Youtube documenting the painting of a small floral still life in oil.

Thursday, March 27, 2014

Op-Shopping

I've been doing quite a bit of op-shopping since shifting my focus to still life paintings. I now have a small but interesting collection of ornaments including cups, vases and candlesticks. Patience and persistence are key when looking for gems at thrift shops. Many visits result in no purchases at all but every once in a while there will be something that just begs to be purchased.

I popped into a local op-shop a couple of days ago and spotted a brass jug standing among the wood and metal bric-a-brac. I loved the shape and since I'm particularly interested in including brass objects in still life paintings, I had to have it.

Apparently these wide-mouthed pitchers are called ewers. This one, I believe, was made in India. It's solid brass, stands around 20cm tall and weighs over half a kilogram. Online values for seemingly identical ewers range from around $15 to over $90. I think the lower price is more reflective of the true value.

Brass is often lacquered to prevent tarnishing but the lacquer coating eventually breaks down in some areas, leaving a combination of shiny and tarnished metal. In this case, all vertical and upward-facing surfaces were completely tarnished while all downward-facing surfaces were still quite bright. Although this is fairly typical, I didn't really want to use it like this in paintings, so I decided to clean it up a bit.

Here's the before and after pics...

tarnished unpolished brass Indian ewer pitcher jug
polished brass Indian ewer pitcher jug

I removed the lacquer with lacquer thinners (this is definitely an outdoor job), then used car polish and elbow grease to bring the brass to an overall level of brightness. If this were a display piece, I would polish it further to remove remaining spots of heavy tarnish, then apply a coat of wax to deliver a mirror-like shine and a level of protection. But I don't want it to be too reflective so I'll actually leave it to tarnish a bit then hit it with a light coat of either lacquer or wax.

Keep an eye out for it in future paintings.

Thursday, January 9, 2014

Profiting from Copyright Infringement

The never-ending battle continues.

I have just filed four notices of copyright infringement with Youtube. The first notice has already resulted in the taking down of a copy of one of my plein air painting videos that had been uploaded to another account.

(UPDATE: Seven videos from three near-identical accounts. All copies now removed. UPDATE Jan 29: It appears the offending channels have been deleted.)


Yesterday afternoon I was showing a friend some of my videos on Youtube but I noticed that infringing copies on two other channels were often the first ones to come up in the Youtube search results. This is, to put it mildly, annoying.

Taking a look at the two offending channels, each of which contains over 200 videos, it was soon clear to me that these were not fans celebrating the work of their favourite artists. Their content includes all types of "paint" from watercolour to house paint and the "About" information consists of nothing more than long lists of paint-related key words.

It appears to me that the channels in question are monetised, which means they receive payment every time a video on their channel is viewed. I suspect the channels are there solely to attract viewers, presumably to profit from views, and that the account holder has little interest in the material reproduced on the site.

When someone steals your content, they also steal your viewers. If your own channel is is monetised, then the copyright offender is also stealing your money.

Most importantly, perhaps, is that the original author misses out on interacting with viewers. Comments and questions asked on copyright-offending channels usually go unanswered as the channel owner is unlikely to care or even be in a position to answer questions. Likes and dislikes are important ways for an author to gauge viewer interest and guide future projects, but they do not get this information if the content is viewed and rated elsewhere.


If you find interesting-looking videos on Youtube, check who has posted it and, if they don't appear to be the author, take a look around Youtube and see if you can find the person who owns that video content. Then view the videos on the authors' Youtube sites instead.

How to lodge a Copyright Complaint on Youtube:

If you are an author who feels their video copyright has been infringed, lodge a complaint with Youtube.


Click on the flag symbol under the offending video and a list of options will appear. Choose "Infringes my rights" then choose "Infringes my copyright" from the next list to appear. Press submit.

From the next window, choose the option to submit a copyright complaint and another browser window/tab will open up where you can fill out all the relevant information including the web address of the offending videos and the address of your original. You can include multiple complaints on one form by choosing "Add another video".

Copyright complaints are legal claims to ownership and there can be penalties for lodging false claims, so you will also have to fill out some personal details plus make a declaration that you own the content and are making the complaint in good faith. Hit the submit button and you will receive emails from Youtube advising you of the status of the complaint. Hopefully the offending video will be removed within 24 hours.

If enough complaints are received, I understand Youtube is likely to delete an entire channel. If a channel exists only to profit from other people's work, without credit or agreement, then this would be a good outcome.

Friday, September 20, 2013

Composition: plein air seascape in oil

When painting on location, there often isn't time to mess around with composing a scene.

If you have plenty of light left in the day, it can be very handy to knock out a couple of one-minute thumbnail sketches to see what presents itself as a strong composition. But as sunset draws near, those couple of minutes become precious. And you don't necessarily have a lot of different shaped boards to choose from when you're out and about so your composition options are limited from the outset.

This evening I headed back to the coast (almost 70km away) to see if I could do another cloud painting. We've had heavy cloud all day, not ideal conditions for painting either clouds or sunlight, but I decided to take the chance.

I arrived at Mutton Bird Beach about an hour-and-a-half before sunset and looked around for possible paintings. I did a few thumbnails but the light was dreadful so I continued looking around the area since I've not spent much time there before.

After walking a couple of kilometres down a four-wheel-drive track, and finding a spectacular location for future paintings, I headed back to the car park about half-an-hour before sunset.

The sky had cleared dramatically and Shelter Island was almost-glowing in the evening light. I knew it wouldn't last.

I quickly set up my easel, grabbed a board and began painting as soon as I could. Composition was the least of my concerns, I just wanted to record the sunlight. I didn't even stop to take a photo to use as a reference later, if I needed it.

I wanted to get rid of the white of the board so I could lay in some of the sunlight colours fairly accurately. I washed in major tones with paint so thin it was like watercolour - it's faster that way. Then I mixed up a couple of warm colours for the sunlit shrubs and rocks and roughed out those areas.

The island enjoyed sunlight for about five minutes after I began painting then the sun dropped behind a bank of clouds. With the sunlit image pretty clear in my mind, I continued painting even though everything was now in shadow.

In some respects, it was probably handy that the sunlight had gone because I wouldn't be teased by the scene changing colour every couple of minutes, as happens at that time of the day, and I could stick with the colour decisions I'd already locked in. I also had to not be distracted by the amazing stuff going on in the western sky (it was a gorgeous sunset).

I packed up when I realised it was so dark, I couldn't really tell what colour I was using anymore.

Shelter Island, Mutton Bird, Albany. Pleion air seascape by Andy Dolphin.
 Shelter Island. 
Plein air sketch. 30x25cm oil on board.
© Andy Dolphin

Palette: French ultramarine, cadmium scarlet, cadmium yellow light, titanium white.

The painting is pretty rough. Some of the paint is so thin, I don't think it could be considered archival, so I can't sell it. I also think the composition is pretty boring. But I really like the main area of light and shade so I took a quick photo and messed around in Photoshop to see what compositional possibilities there were.

Plein air oil seascape compositions.

I particularly like the intimacy of option number two and think I might head back to the location with that composition in mind as my starting point. And, with half the problem already solved, I could probably do a larger painting and take a little more time by starting earlier in the day.

Over the last couple of years, my attitude to plein air work has changed - and continues to change. I used to only paint if the light was perfect and likely to remain stable and if I was pretty sure I'd get a finished painting from a session. I'd usually spend two hours or more on one painting on location.

These days, I'm forcing myself to be more adventurous. I head out when it's cloudy, I start paintings late in the day when stable light is not just unlikely, it's impossible. I paint fast and I end up with whatever I end up with. Sometimes I get a result that's worth framing, sometimes I need to do some touching-up in the studio for a frameable result and other times I scrape the painting, or let it dry then throw it in the corner, with all the other "could-a-beens".

Quite a few of the paintings I've posted on this blog are in that pile because the blog isn't about great art but the pursuit of art. I'm pretty fussy about what I actually let out of the door and into the market place.

But the "failures" still have value, even if it's just from the act of getting out and painting - and that is possibly the most valuable part of the experience. It's taken me a long time to realise just how important it is to just get out there and paint and "bugger the consequences".

Twelve months ago, or even six months ago, I would not have thrown the easel in the car on a day like today. I would have looked out at the grey sky and decided to give painting a miss. As it turned out, I took the chance, went for the drive and had an amazing afternoon.

I still struggle with painting when there's no clear sunlight and shadow, but that can be next year's project.

Saturday, March 23, 2013

Lone Karri - plein air landscape revisited

Karri tree. Plein air landscape oil painting by Andy Dolphin.
Lone Karri. 
Plein air sketch. 25x30cm oil on board. 
© Andy Dolphin
SOLD

I took another look at the plein air painting of a Karri tree that I did last weekend. The original painting is shown above. As always, click the image for a bigger view.

I mentioned at the time that I wanted to adjust a few things and here's the revised picture.

Karri tree. Plein air landscape oil painting by Andy Dolphin.
Lone Karri. 
Plein air sketch. 25x30cm oil on board. 
© Andy Dolphin
SOLD

I gave the original picture a light coating of alkyd medium and rubbed it in with a lint-free cloth. This brings back some of the gloss that is lost when the paint dries, making it easier to colour-match. It also provides a better surface for retouching as the brush will slide easier over the wet medium and the new paint edges can be blended more easily.

There were three principal things I wanted to achieve.
  1. Enhance overall brightness and warmth
  2. More separation between foreground and background
  3. Fix some minor compositional problems
I began by adding more warmth to the lightest part of the sky and, using this as a starting point, lightened and brightened the distant hills and tree line. At the same time, I adjusted the large background tree to give it a better shape and stop it "kissing" the foreground tree.

I made minor adjustments to the light and shadow in the canopy of the main tree. I was trying not to get too fidgety here - always a risk.

The original plein air work was completed with a very limited palette or ultramarine, permanent crimson, burnt sienna and yellow ochre. In hindsight, I felt this one needed more saturated colour as we are just at the start of autumn and it was a very warm, clear day. So in the studio I added cad yellow deep, cad scarlet and permanent crimson to the palette. It only took a little of these colours, mixed with the three original colours, to add the vibrancy I needed in the foreground grass and the warm reflected light on the tree trunk and branches.

The warmth in the tree trunk not only helps to separate it from the cool atmospheric hill in the background, but also better depicts the reality of the scene on the day. The original painting, by comparison, now looks like it was painted on an overcast day.

Sunday, March 17, 2013

Plein Air Magazine


Mid-last year I subscribed to Plein Air Magazine after seeing it mentioned on a couple of blogs written by respected artists. I didn't want to mention it here until I'd received a few issues and determined if it was a product I'd want to recommend.

Having just received my fourth issue, I think I can make that recommendation now.

As magazine subscriptions go, this one is pretty cheap with an international price of US$74.98 a year, including postage, for six editions of the print version. Savings are available for two- and three-year subscriptions. Note that US subscriptions are much, much cheaper still.

There is also a digital version of the magazine available. The publisher is responsible for organising a major plein air expo each year in the US and promotes and supports other events related to plein air painting.

Each issue of the magazine naturally features articles about plein air painters but also about collectors and sometimes a little art history. There's a fair bit of advertising but it is segregated to the front and back of the mag, leaving the middle for the stories. Many of the ads in the front section feature large reproductions of paintings by selected artists and are quite informative in themselves.

The magazine's website offers a lot of free content too, including a weekly email newsletter, and you don't need to be a subscriber to access it.

If you're interested in plein air painting, this might be the magazine for you.

Saturday, March 2, 2013

Seascape painting; Misery

It's not as bad as it sounds...

On Wednesday I headed down to Misery Beach, near Albany. I'm not sure how this gorgeous and secluded little beach got its name but one popular suggestion is that waste products from the nearby whaling station used to wash up here before the facility ceased operations in 1978.

Conditions were mostly overcast when I arrived but the sun did break through in short intervals every ten or fifteen minutes, or so. It was windy too!

It's been a long time since I've set up the easel on beach sand and it's always an interesting challenge. The legs have to be fully extended and pushed into the sand - because they're going to sink in anyway and you don't need that happening while you're painting. And you have to be careful not to get sand into everything when you're doing stuff you normally don't need to think about.

Oh, and don't drop a brush full of paint into the sand. It's a nuisance. I know because I did it. Luckily it was only my rigger so it was easy to clean. If you drop your main brush, you'll almost certainly end up spreading grains of sand across your painting unless you have a large jar of solvent you can rinse it out in.

Anyway, here's the location shot. I had to fold up the easel and lean it against a stair case because the wind was threatening to blow it over if I walked away while it was still set up.

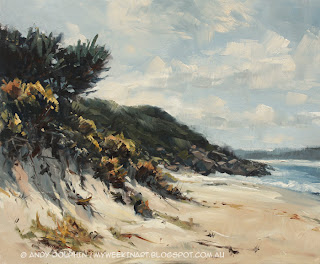
Location. Misery Beach, Albany. Pleain air seascape in oil by Andy Dolphin

And here's the finished piece with no adjustments or additions made later.

Misery Beach, Albany. Pleain air seascape in oil by Andy Dolphin
 (Misery Beach. Plein air sketch. 30x25cm oil on board. © Andy Dolphin)

I used a very limited palette for this one to keep things simple. Because of the overcast conditions, I went for ultramarine, burnt sienna and yellow ochre. I chose these colours because the actual scene reminded me of one of the paintings in the "oil painting in different palettes" exercise I did last year.

It was mid-afternoon when I painted this. The key to it, and what attracted my attention, is the shadow being cast half-way down the face of the dune and the way this shadow-highlight line zig-zags into the scene.

One hour earlier that shadow wouldn't have been there at all. One hour later, as I was finishing, the shadow covered the whole face of the dune. Either case might still have offered the opportunity for  a satisfactory painting but each one would have a different feeling.

Sunday, January 27, 2013

Evolution of a seacape in oil - V

I have actually been doing a bit of painting recently but all of it has been in the studio and has involved revisiting old paintings that never "made the cut".

This isn't something I have done a lot of in the past but lately I've been driven to discover why some paintings end up on "the pile in the corner", instead of hanging in a frame. So I've been looking through that pile to see where I can spot obvious design errors as, in many cases, this is where a painting fails.

One of the pieces I looked at this week was a painting of Lights Beach I did in March last year.

Lights Beach, seascape oil painting by andy dolphin
 (Breaker at Lights Beach - sketch. 30x20cm oil on board. © Andy Dolphin)

This painting was done as an exercise, from photographic references, and I have messed with it several times in the last 10 months, playing with shapes and contrasts to see if I could get more out of it. My main interest early on was the depiction of the foam trails breaking up as the transparent water rises into the main wave.

It is fairly true to the photos but I always felt it was a little contradictory as it portrayed a supposedly large threatening wave but was, at the same time, bright and sunny. My biggest issue with it, however, was the relatively horizontal feeling of the design, the detachment of the rocky areas and the lack of a path through the painting to the focal point. There is a path there, through the greenish water to the peak of the wave, but it's very subtle and doesn't act to connect to the foreground to the middle ground.

I've painted quite a few plein air wave studies since last March and I feel I'm in a better position now to incorporate some of that experience into future seascapes.

I put the small painting on my easel and gave it a light coating of alkyd medium to wet the surface and bring the painting back to life. With just a few colours on the palette, I spent about half an hour loosely "sculpting" paint over the old painting. Abandoning my earlier focus on the transparent part of the wave, I altered shapes and shadows in an attempt to get a more dynamic composition and more of a feeling of power in the surf.

Here's where it's at now...
 
Lights Beach, seascape oil painting by andy dolphin
(Breaker at Lights Beach - sketch. 30x20cm oil on board. © Andy Dolphin)

It's pretty loose, with some areas almost completely unresolved, but that's okay for this painting. What matters more is that the foreground and middle ground are now decidedly interconnected and that there is a feeling of powerful movement in both the foreground and mid-ground water.

While it is no longer exactly like the original photo reference, it is still true to the location and captures the feeling of the place much better. It feels like it has potential now and I'll visit it again soon in order to tidy a few things up.

The revised painting now becomes stage 5 in my Evolution of a seascape in oil series.

Seascape oil painting series:
Genesis of a seascape in oil - I
Genesis of a seascape in oil - II
Genesis of a seascape in oil - III
Evolution of a seascape in oil - IV
Evolution of a seascape in oil - V 
Evolution of a seascape in oil - VI

Saturday, January 5, 2013

Lowlands surf - plein air seacape in oils

Lowlands Beach, near Albany, Denmark, WA. Photo by Andy Dolphin
 Lowlands Beach, Denmark. Photo by Andy Dolphin.

My second painting for 2013 was, in some ways, an exercise in not giving up.

We've had pretty strong winds for the last couple of days so I assumed the surf would be pounding along the southern coast. With this in mind, I decided to head to Lowlands Beach, between Albany and Denmark, to see what was happening.

It was pumping! The spray in the photo above is reaching over 50m high, in strong wind.

I stood at the lookout, high above the rocks, and stared. The action below was non-stop and complicated. I must have pondered the scene for 45 minutes or so trying to select an area and cement an image in my mind. Several times I considered moving on to find a location that was simpler and more protected from the wind.

Eventually I just decided to sit and scribble a thumbnail. Hmmm, possibilities. With that done, I decided to set up the easel and have a go. I haven't really painted in a situation quite like this before but, since I was prepared to fail, it didn't matter what result I got.

I decided to just rough out where the major rock forms were but not complete them, yet. Then I focused my attention on the area where the breakers were hitting the rocks. Every wave is different and the bursts of spray last mere seconds, so there's a fair bit of invention involved in capturing the general feeling. I put the burst where I wanted it.

I worked my way out from the focal point and completed other areas in stages until I was happy with the results. By that time the sun had almost set.

Here's the location shot...

Lowlands Beach plein air seascape oil painting. By Andy Dolphin.

And here's the painting...

Lowlands Beach plein air seascape oil painting. By Andy Dolphin.
 (Pounding surf, Lowlands. Plein air sketch.
35x25cm oil on board. © Andy Dolphin)

It's funny that once the painting is done it all looks so simple, but there was a lot of stopping and staring involved in this one. I spent almost as much time squinting at the scene as I did painting. The lesson here is to not give up and to accept possible failure as a part of progress.

I used a very limited palette on this painting. Ultramarine, cerulean, burnt sienna and cad yellow deep. Mixing nice transparent purple-blue shadows is impossible with that combination of colours but it really wasn't that kind of day anyway. Limiting my colour choices meant I could concentrate more on composition and tone.

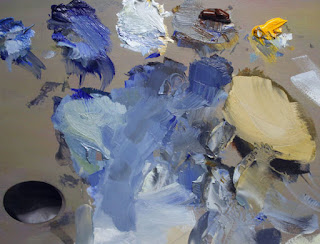
Here's how my mixing palette ended up...

Seascape oil painting palette. Andy Dolphin.

Friday, October 26, 2012

Lowlands Beach - plein air oil

With clear skies and moderate temperatures forecast, I headed back to Lowlands Beach (near Denmark, Western Australia) yesterday afternoon.

I parked at the top lookout on the eastern side of the main beach. The lookout is about 50m above the sea and offers views across the main bay and to the rocky point below.

I watched the waves for a while, not entirely convinced I was going to get a painting out of it. But then I focussed on one large rock below the lookout and, although it was a reasonable distance away, I thought it was worth a shot at painting.

Here's the scene as the camera saw it at 50mm zoom, which approximates our normal field of view. I'm about 50m up and the clear blue water is about 60m from the cliff I'm standing on - so, according to Pythagoras, that vertical boulder to the right of centre is about 78m away from me.

Lowlands Beach, Albany-Denmark, WA. Photo by Andy Dolphin

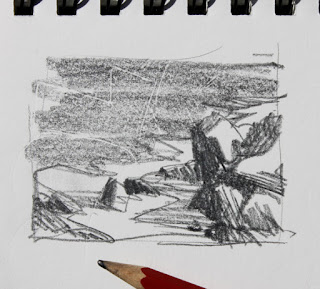
As you can see, there's a lot going on with all those rocks so my first major decision was to choose the boundaries for the painting. I rarely do thumbnail sketches – I should do them, but I don't – but this time I thought it would be wise to plan ahead a little. I chose to focus on the vertical boulder and small area of white water in the centre of the view (the blunt HB pencil in the photo below is for illustrative purposes only, if you'll pardon the pun. It's not the pencil I used but gives you an idea of scale).

Lowlands Beach thumbnail sketch

The thumbnail sketch suggested that I should pay attention to the strong contrast between the foamy white water and the adjacent rocks and clear water. I could use the whitewater to draw the eye in to the main rock. I made the decision at this point to alter the relative size of the rocks near the middle and to the left so that they didn't all end up the same size. I also decided that I should keep the two central rocks grouped as a single unit. I was also captivated by the lengthening shadows cast on the white water by the rocks and decided these would help to hold all the rocks together giving me a large interesting dark shape rather than a scattered collection of bits.

That's quite a few decisions from a one-minute sketch - and it's more decisions than I usually make before starting to paint. I really should do thumbnails more often, I'd probably waste a lot less paint!

I began by washing in the major darks on a white-primed panel. I wiped back a couple of highlight areas in the rocks and there's a hint of swell out in the open water.

Plein air oil painting seascape, step by step, by Andy Dolphin.

Next I laid in the the white water using a purple-blue for the shaded parts and a warmer green-blue for where the sun would be hitting. It was important to lock this down fairly early as it wouldn't be long before all the foreground white water would be in shadow. You'll notice I dragged the foam over the clear water to create an interesting transition zone. I was feeling pretty positive at this stage.

Plein air oil painting seascape, step by step, by Andy Dolphin.

Here's the obligatory location shot of the painting as it was when I packed up. It was getting dark by now and although the sunset was beautiful, there's no sunlight shining on the rocks below any more.

Lowlands, Denmark, WA. Plein air oil painting seascape by Andy Dolphin.

Below is the finished painting in daylight. I barely touched it in the studio so it's about 99.9% as it was on site. If you squint, you'll see how the shadow area on the white water becomes part of the dark tone of the rock mass. It can be tough to get that tone right because we tend to perceive even the shadow areas of white foam as very light. Squinting at the scene is the key to getting it right.

Lowlands Beach rocks, near Albany, WA. Plein air oil painting seascape by Andy Dolphin.
 (Lowlands rocks. Plein air sketch. 30x25cm oil on board. © Andy Dolphin)

I will probably lop a couple of centimetres off the top of this painting as there's nothing of interest up there, plus the image is split almost 50/50 diagonally and the tall rock feels too low in the frame. I knew all this early on (my thumbnail is a better shape) but that's the board I had with me so I just went with it. If I chop it, I'll end up with something like this.

Lowlands Beach rocks, near Albany, WA. Edited plein air oil painting seascape by Andy Dolphin.
 (Lowlands rocks, edited. © Andy Dolphin)

Much nicer proportions, I think.

Of course, sawing a piece off a panel is pretty trivial (unless the saw slips but let's not go there). Real problems arise, however, if you finish a painting then realise you need to make the panel bigger – so try to avoid that eh?

Thursday, October 18, 2012

A little about brushwork

When I first switched from commercial to fine art, I tended to paint with almost painstaking attention to detail. I used fine brushes and painted leaves on shrubbery in forest landscapes or feathers on portraits of birds. It was a hangover from my days working as an illustrator.

My style has evolved over the last decade, with small breakthroughs in technique occurring every couple of years. It's taken me a long time to loosen up but the last year has seen me become more comfortable with producing loose-looking brushwork.

This particular breakthrough probably came about as a result of a combination of factors:
  • Painting outdoors far more often
  • Forcing myself to simplify
  • Doing a lot of small paintings
  • Setting time limits on some paintings
  • Using three brushes, or less
  • Rarely using "small" brushes
I switched to using chisel-edged, flat synthetic brushes about a year ago. I'd discovered such a brush that I'd owned for years but never used. I tried it, liked it and bought a few more. I've rarely touched my old bristle brushes since (and several of them should probably be binned anyway).

I mention all this because I was speaking to a friend last night who was giving me her assessment of some of my work. The paintings that really caught her eye were the more expressive ones, with loose brushwork. She felt they had more "personality" – a bit more of "me".

With that in mind, I thought I'd post a close-up of the karri tree painting I did last week. Here's some of the brushwork in the shrubbery at the base of the main tree.

oil painting brushwork
click to see the detail 

Those almost-horizontal green strokes near the centre represent bracken ferns. Ten years ago I would have spent hours just on them, while these ferns took mere seconds to paint and, for a painting this size, they are as successful as any of the detailed plants I painted in the past.

These plants are only as detailed as they need to be but they aren't thrown on randomly, without any thought. They have tone, colour and temperature. Some parts are in shadow, other parts in sunlight and they express the umbrella-like flatness of bracken ferns – and, although they sit against a very dark area, they are restrained enough to not steal attention from the rest of the painting.

Those strokes were painted with one brush, about 1.5cm (3/4") wide. I placed the loaded brush flat on the surface and dragged it very slightly to make the main strokes. First the cool green shadow then the warm sunlit area. I used the corner of the brush to make the bright, specular highlights.

In fact, I used two brushes of that size on this painting, one for the sunlit colours and one for the shadow tones. I used a slightly smaller one for some "detail" and, finally, I used a rigger for a few "grassy" strokes here and there. Most of what you see, however, was painted with the two larger brushes.

The thin vertical strokes in the ferns were probably also painted with those large brushes as they are certainly capable of producing sharp lines. It is also possible, however, that I flicked those strokes on with a rigger. The thin, twiggy lines near the bottom are a combination of scratching with a satay stick and painting with the rigger.

The point of all this?

Paint loosely, not carelessly.

Friday, October 12, 2012

Karri: a plein air landscape in oil

Over the years I've painted a lot of karri trees. I saw most of them as "tree portraits", each painting trying to capture the character of a tree in a particular location. Ive painted them next to winding tracks, streams and bridges and I've had them side-lit, back-lit and front-lit. Almost all of them were painted from photo references.

Yesterday, with near-perfect spring weather, I headed out to the Porongurup Range and took a drive through the karri. I was looking for dancing light on some of the granite boulders that populate many parts of the forest but came around one bend and saw sunlight streaming past a large karri perched on the edge of the embankment. I had to paint it!

I took a few minutes to consider composition options - how high, how wide, what to leave in and what to leave out. Then set to work.

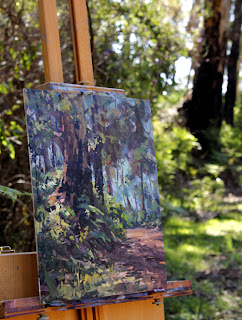
Here's the on-location photo showing the painting almost finished.

Plein air oil painting - location shot. Karri tree, Porongurup. By Andy Dolphin.

Here's the "morning after" shot.

Plein air oil painting. Karri tree, Porongurup.
Karri on the edge. 
Plein air sketch. 30x25cm oil on board. 
© Andy Dolphin
NOT FOR SALE

I did very little studio work on this, mainly adjusting a few darks and lights that had gone a little muddy in the plein-air rush. It's painted with a fairly limited palette of French ultramarine, cerulean, permanent crimson, cad yellow light and burnt sienna.

I thought I'd take this opportunity to show why photographs are often poor reference material for painting. Here's a shot I took when I began yesterday's painting.

Karri tree, Porongurup. Photo by Andy Dolphin.

Other than resizing for the blog, this photo is straight from the camera. It was taken with a Canon DSLR. It's a reasonable quality camera with a decent digital chip and, while I don't consider myself a great photographer, I do have some idea about how to use it. Professional photographers might get better results, but how many of us are professional photographers?

In the photo, everything is either green, "grey" or black. The gravel road, that was positively glowing a rich terracotta, looks dead here. The greens are almost-universally cold and vary more in tone than colour or temperature. There's no hint of the warm spring weather I was enjoying. The shadow from the tree is just a big mass of dark "something" and the sky shows barely a hint of blue.

I stood and stared at this tree for over an hour and can assure you, the photo doesn't come close to how things actually looked. Sure there's some exaggeration in my painting but I'm hardly an expressionist. The scene really was filled with colour and warmth. There was texture and detail visible in the dark lower bark of the main tree and the sunlit area at the left-hand base of that tree glowed with rich reddish earth tones - it's what caught my eye in the first place. The canopy of the distant trees was similarly bathed in sunlight - everything back there seemed to be glowing. In fact, I had to tone some areas down in my painting so they didn't compete with my main area of interest.

It's spring. If you visit the Porongurups at this time of year, you're greeted with reds, blues, yellows and pinks of wildflowers, yet the photo above gives no hint of this. It could just as easily be a clear winter's day. With a painting, we can include the colours of the spring, even if there don't happen to be any flowers visible in the exact spot we're painting.

I can adjust this photo in Photoshop to get it closer to how I remember things but, even then, it lacks useful information. To use it as a photo reference, I'd have to be inventive and to do that successfully, I'd need a lot of experience with the subject matter. And if I didn't look at the photo until month after I took it, would I even remember what caught my eye on the day? History suggests to me that I wouldn't.

In short, if you can possibly get out and paint on location, do it. It doesn't matter if the individual paintings fail (I did another one after this that I scraped off as soon as I got home). What matters is experiencing nature first hand.

Monday, September 10, 2012

Copyright - do you "get it"?

 And now for something completely different...

I first took an interest in copyright years ago when I was producing commercial illustration. Not because someone had stolen my work but because I wanted to be informed about my rights with regard to my own work and also to know what I was, and more importantly was not, allowed to do with other people's work.

History has taught me that I seem to be in a tiny minority. While almost no one could be in much doubt these days about the illegality of copying music and video, few people seem to understand, or care about, copyright in relation to artworks.

Before I continue, let me state that I am not a lawyer and do not have in-depth knowledge of copyright law. But I think I can give the reader a few things to think about.

Firstly, it's "CopyRIGHT", not "CopyWRITE". 

Copyright, as the term implies, is about the "right to copy" something. It could be a song, a movie, a painting, a piece of pottery or, indeed, written words. Copyright exists the moment a work is created. It does not have to be registered or contain a copyright (©) symbol. Even a quick sketch on a café napkin has automatic copyright protection.

If you want to use someone else's work but have no understanding of your rights then it might be safest to live by the simplest "rule":

If you didn't make it and you didn't pay for the right to copy it, you probably don't have the right to copy it. So don't do it.

That's pretty blunt, and yes, there are exceptions, but it sums up almost every situation you might find yourself in when considering if you have the right to use artwork, including photographs, for your own purposes.

You don't own the internet and almost all the things on it don't, and never will, belong to you.

When you want to make an advertisement, logo or promotional print for your club, business or just for yourself, you can't legally just go to "Google Images", find a picture you like and use it. It's stealing.

Google does not own the rights to the images it serves up in a search so Google has no power to authorise the use of those images. Think of a Google search as "window shopping" - you can see the products you want but that doesn't mean you can just take them and use them without permission. The images almost always belong to someone and that someone probably isn't you. It's a pain, but that's reality for you.

Exceptions might apply if the author specifically gives rights to use their works for certain purposes. For example, I state in my sidebar that my blog images can be used freely in some circumstances and that permission can be sought for other uses - and I have given that permission, for free, to several people who have asked. But you cannot use one in an advertisement for your business, for example, without permission.

There are also exceptions in the law that might allow you to use an image without permission. Copyright law differs from country to country but such exceptions might include:
  • review or criticism
  • research or study
  • news-reporting
  • judicial proceedings or professional legal advice
  • parody or satire
[source: wikipedia

There's also quite a bit of nonsense surrounding copyright law...

Silly reasons to infringe copyright:
  •  "it's okay if you change 10% of it" - nonsense. 
  • "it's okay, I'm not making money off it" - doesn't matter
  • "the web is public domain" - nonsense
  • "I improved it. You should be happy" - nonsense
  • "I'm giving you better exposure" - doesn't matter
  • "I included your signature or link" - doesn't matter
  • "I don't know who owns it" - not you
  • "I tried to contact the author" - you failed
  • "I was on a deadline" - doesn't matter
  • "It didn't have a © symbol on it" - doesn't need one
  • "I copied it from an amateur" - it's still copyrighted
  • "It said 'free desktop wallpaper'" - it didn't say "copy me"
There are more. Some people seem to be able to easily remember the complicated nonsense, but never the simple reality.

Copyright and fine art:

Artists, and some art owners, should learn about copyright and how it might apply to them. 

Buying a painting, for example, does not mean you also own the right to reproduce that painting. You own the item, but not the intellectual property. You can hang it on your wall. You can re-frame it (usually). You can probably burn it to warm yourself on a winter's night. But you can't make postcards from the image because that requires copying. The artist always retains the copyright unless they explicitly transfer that right, in whole or in part, to someone else - or maybe if they died over 70 years ago (and that number keeps changing).

Artists often learn their craft by copying existing works. They might copy from the old masters, from "how to" books or from workshop demonstrators. Obviously demonstration pieces are intended to be copied for learning purposes - but that's pretty much where the right to copy ends. Copied pieces should not usually be offered for sale as the copying artist's own work and should never be entered into competitions since the creative foundation of the painting is a large part of what gets judged - and the expression of the idea isn't yours, it belongs to the original artist.

The lines can sometimes seem a little blurry and if you're unsure, seek legal advice. If that's too expensive, then you probably can't afford the risk of a copyright infringement anyway.

The world is growing smaller by the day. Things that happen in the most isolated corner of Australia can now be seen, within seconds, from the other side of the world. To illustrate why this matters, let me briefly tell you the tale of  "Cooks Source", a small, free, hand-delivered publication produced in America since 1997.

Cooks Source were apparently reproducing, without permission, recipes they'd sourced on the internet. When they were caught out by the author of some of the recipes, Cooks Source defended their action claiming the internet is "considered public domain" and effectively telling the author she should be happy they'd used them. "The internet" retaliated and within hours word spread across blogs and social media sites illustrating a phenomenon known as the Streisand Effect (where an attempt to hide a situation results in it receiving much wider publicity). The magazine's own Facebook page was bombed with complaints. I witnessed it all happening - it was a sight to behold.

After some 13 years of operation, Cooks Source closed two weeks after the internet backlash. It was an incredible lesson in where copyright infringement might lead.

You can read the full story on wikipedia.

Again, I am not a lawyer. Do not rely on this as advice. If you're in Australia, however, you might want to visit the Copyright Council of Australia's website or Arts Law for more detailed information.

Comments are very welcome and, I'll make adjustments or additions to this article as the need arises.

Thursday, August 30, 2012

Oil and digital seascape sketches

Photo of Green Islands, Albany WA. Andy Dolphin.
View to Green Islands, Albany. Photo by Andy Dolphin.

Date: Wednesday, August 29, 2012
Weather Forecast: Becoming fine.

I returned to Torndirrup National Park yesterday afternoon in the hope of capturing the sea at its best as we'd had a bit of stormy weather the day before. When I arrived, there was a decent swell combined with a high tide pushing some big waves into shore. A gentle, warm breeze made conditions perfect for painting.

I love the way some waves hit the rocks and explode. There's no other way to describe it. The best of them even send out a solid "boom!" when they hit. You can feel it in your chest.

I set up in a moderately comfy spot well above the wave line and got to work. Using ultramarine, burnt sienna and cad yellow light, I looked straight into the sun and got this...

Seascape oil sketch by Andy Dolphin
(Boom! Sketch. 30x25cm oil on board. © Andy Dolphin)

For a plein air piece, I'm pretty happy with it. There's a lot going on when you're there, on site. Every wave is different and they don't all go "boom!" right where you want them to - and a lot of those that do go "boom!" in the right place, do it when you're looking elsewhere. The clouds shift constantly so the sheen on the water comes and goes and the sun sets quickly, dropping more into view and changing the colour of everything. I tried to ignore all that and spent just over an hour on this painting.

This morning, without looking at yesterday's painting, and relying solely on memory, I did a quick digital sketch of the "same" subject. There's about half an hour's work here...

(Boom! Digital sketch. 800x600px. © Andy Dolphin)

The beauty of working from memory like this is that reality doesn't interfere. With the memory of yesterday still vivid, I can design things the way I want them, out of my head. I put rocks where I want them, invent wave directions and use colours that I feel will achieve the desired result.

It can be difficult to make such decisions in the field with a scene that always looks exciting but which won't stay still. For example, I noticed at one point that the splashes of the waves were casting very clear shadows across the foreground water at times, but installing those shadows into a half-finished oil sketch can be problematic because there just isn't time to be fussing with it. But those shadows were still clear in my mind this morning and I made sure to use them in the digital sketch.

The photo at the top of the article shows how the day ended, shortly after I'd packed up. What an awful way to have to spend an afternoon eh?

Sunday, August 26, 2012

Plein air challenge!

Green island albany with clouds
Green Islands, Albany. Photo by Andy Dolphin.

Date: Sunday, August 26, 2012
Weather Forecast: Fine with a late change

I made the decision that, with fine weather forecast, I'd head out to a spot near Albany that offers incredible views over the Torndirrup coastline. My plan today was to come home with more than just photos.

I found a spot just off the walk trail, and a few metres short of a very long drop over a very high cliff. I was around 180m above sea level. The sun was shining, the sky was clear and there was a gentle breeze blowing. It was near-perfect. So I set up my easel and got to work.

I worked on a panel that had been stained with burnt sienna. I used it mainly because I had it with me and it was the right shape.

Knowing the light would change dramatically, I pre-mixed small samples of critical colours and referred to these throughout the painting process. I used my oil colour chart to determine the best colours to use for each mix and was surprised to note that the deep ocean was almost a perfect match to cerulean blue out of the tube. In fact, cerulean featured in mixes throughout the painting from the sky to the sunlit hills and rocks.

I approached this painting is a relatively steady manner, rather than as a quick sketch. I roughly outlined the major shapes, separating sunlit and shaded areas, before under-painting all parts in approximate final colours. Then I painted the sky and worked my way down and "forward", painting into all areas before adding the white-wash along the edge of the coastline. I left the white-wash until fairly late in the process because it doesn't really shift much in colour. My main concern was the shadow side of the hills because I knew those shadows would disappear completely as the sun moved higher in the sky. I finished with dark accents and highlights.

A strong wind warning had been issued for the afternoon and the breeze grew steadily over the two hours that I painted. I eventually had to take my hat off because I was holding onto my easel with my spare hand. If anything blew away, I wasn't going after it!

location plein air seascape in oil by Andy Dolphin

While I was packing up, TRAGEDY!!!! struck!!! (Yes, there were definitely exclamation marks when it happened). The very wet painting fell off the easel and face first into the sand. Hmmm.


"Golly gee!", I said. "That's just a little bit too authentic", I added. Or, something like that.

When I got back to the studio, I decided it was worth fixing. Using a razor-blade scraper, I carefully removed the paint where the sand was stuck, leaving a ghost of colour behind. I mixed up some fresh paint and set to work. It only took about half an hour to recover things.

 (Plein air View to Cave Point. 35x22cm oil on board. © Andy Dolphin)

Bonus material:

Here's a few "quick" sketches I've done around the Torndirrup coast in the last week or so.

Torndirrup, seascape oil painting by Andy Dolphin.

Torndirrup, the Gap, seascape oil painting by Andy Dolphin.

Torndirrup, the Gap, Cave Point Lighthouse, seascape oil painting by Andy Dolphin.

Showers are forecast for tomorrow but I might head to the coast again, and see what's happening.

Friday, August 10, 2012

Genesis of a seascape in oil - I


For the last couple of weeks I've been working on producing a seascape. I've done my share of seascapes in the past, usually from photographic references, but this one is different. And I'm going to take my readers along for the ride... so I hope it works.

My aim here is to produce a piece of art that uses foundational concepts of design in a way that just happens to be a seascape. This happens in all successful paintings but it is often done intuitively. In developing this painting, I'm looking at tonal masses, lead-ins, temperature contrasts and edges and bringing them together to create a "big picture" view, rather than a detailed analysis of water and rocks.

In order to do this, I've looked at a lot of seascapes by other artists including legends like Frederick Waugh and E. John Robinson. I've had Robinson's book on seascapes in oils and two of his videos for quite some years. I've stared at the paintings, turned them upside-down and converted them to greyscale and tonal images in an effort to look through the wonderful seascape paintings we see at first view to the foundations below. It's like going back to school except I'm the teacher and the student.

It's still winter down here and we've "enjoyed" some cold, wet weather, but I've spent many hours down at the coast watching, photographing and videoing waves, large and small. I've climbed rocks, wandered through sand dunes and walked along secluded and desolate beaches. I've been rained on and covered in sea spray and witnessed some beautifully atmospheric light. It's tough work, but someone has to do it.

I've done all this to really get a feeling for the ocean, especially where it meets the shore. I hope to do a lot more of it too, because the ocean is a complex and mysterious beast. But, for now, I'm directing my recent experience into a painting.

I began by doing a digital painting in Photoshop making a simple abstract shape in three grey tones. Then I looked at how I could turn it into a seascape of sorts. Once I had something with potential, I added colour over the top.

digital seascape rough in grey tones

digital seascape rough in colour

tonal map of digital seascape painting

I was exploiting directional lines and tonal contrast to make an obvious focal point. The tonal map, above, shows that the painting is made up mostly of middle tones. The dark masses take up less space and the lights take up the least. The strongest contrast, where the darkest and lightest values meet, is right at the focal point.

I also introduced a burnt orange into the rocks to contrast against the cool blue colour scheme. Blue and orange are complementary colours so when they are brought together, each one enhances the other. A small area of complementary colour will generally attract the eye and, again, I've used this mainly at the focal point.

Though it was never intended to be anything more than a very rough sketch, this little painting was pushed and pulled and even turned upside-down occasionally to see how it was holding together. This was all done without any reference so I could focus solely on designing an interesting pattern rather than slavishly copying an actual scene.

It's not perfect but it'll do for my purposes.

I'll post part two soon.

Seascape oil painting series:
Genesis of a seascape in oil - I
Genesis of a seascape in oil - II
Genesis of a seascape in oil - III
Evolution of a seascape in oil - IV
Evolution of a seascape in oil - V 
Evolution of a seascape in oil - VI